Use this guide to set up your PM series CNC plasma cutting machines.
CNC Plasma cutting Safety
Do not operate this machine until you have read all warning signs and instructions. You must always follow safety decals on the machine and safety precautions listed in this manual to ensure safe CNC plasma cutting operation.
Make sure the plasma cutter and machine are off when handling the torch to replace consumables.
Make sure to drain water table after each plasma cutting session to avoid flammable hydrogen gas build up from cutting aluminum.
Make sure to clean the machine thoroughly so that all motion components work properly during regular operation.
Common CNC plasma cutting safety precautions:
- Mains power – Risk of electrocution when opening the rear hatch of the controllerbox that exposes all of the electronics.
- Arc light brightness – Risk of eye damage if operator is starring directly at Arc light produced by the torch tip. Always wear proper tinted welding goggles when arc light is present.
- Toxic gases – Risk of respiratory damage if operator inhales the toxic gases produced by the plasma flame. Always make sure water level of machine is at proper height to trap the produced gasses.
- Motion of machine – Risk of bodily injury when operator is near the machine while it is moving, especially to hands and fingers near moving gantry and moving head. These can move fast without stopping so always be cautious when operating.
- Heavy to lift – Handle PM series machines with caution when moving them into place in your shop and use a proper forklift with the correct lift capacity.
Installation
After you have properly unloaded your machine, set it into position in the workspace that it will be used. Ensure the dedicated workspace is provided with a constant supply of water, 120-volt AC power(30 Amp), 220-volt AC power for plasma cutter(50 Amp), and filtered/dehydrated air supply(regulated 100 psi). Then make sure to proceed with the following steps.
- Place the Controllerbox on the stand securely. Plug in the wiring harness connection and plasma cutter connection. Plug in the Controllerbox power cord and plasma cutter power cord.
- Ensure air supply is regulated and filter is active. Connect air supply to plasma cutter and coolant tank(rear section of machine).
- Ensure there is a proper amount of coolant and ratio of water/coolant in reservoir tank.(waterline should be three inches from top of vent)
- Ensure plasma cutter torch is connected properly with correct consumables. Connect ground cable properly to work area. Make sure plasma cutter powers on with correct cut settings and have operator manual at hand for adjustments.
- Ensure Controllerbox computer powers on.
After these steps have been implemented there will a basic platform to begin operating the machine. For more developed layouts and further detail on the installation process download our pdf manual.
Preparation
Now that the machine has been installed we can prepare the computer and software to make parts. This is a 3 step process consisting of designing/drawing the part, creating the tool path, and generating a machine file. There are three programs we use for cnc, in order they are CAD, CAM, and the machine controller.
The CAD program is the program where all drawing and designing of your part are made. CAD is the first step in the CNC process and the primary purpose of this step is to produce a dxf file which is the common CAD drawing file for CNC plasma cutting.
The CAM program controls and creates the toolpath for the part you made and receives dxf files from the CAD program. CAM is the second step to the CNC process and the primary purpose of CAM software is to produce gcode for the machine to read.
The machine controller controls all movement of the machine and receives gcode files from the CAM program. Qtplasmac is the GUI and machine controller of choice with our CNC plasma tables.
Proceed with the following steps bellow to begin preparations using sheetcam.
- Make sure Sheetcam is installed and configured on a separate PC.
- Once the part has been drawn using CAD make sure you export a DXF file of your design.
- Import the DXF file into Sheetcam for the second step(CAM). Use sheetcam’s parameters to optimize your operation.
- Third Step with the correct parameters and operation settings post process your toolpath by clicking the “P” button in the upper left of the screen.
- Import the generated file into LinuxCNC for the next step operation.
At this stage we recommend powering the machine on to test functions. Toggle the machine to check for precise movement and toggle the torch on and off to check the plasma cutter. This is recommended to inspect the machines proper functionality and use in the initial stage.
We now have the Controllerbox computer ready with the programs configured. Now we can begin making operations for the machine to perform.
Operation
Operation is the third and final step in the CNC process and for this we will specifically use the machine controller Qtplasmac. Follow these steps to operate the machine.
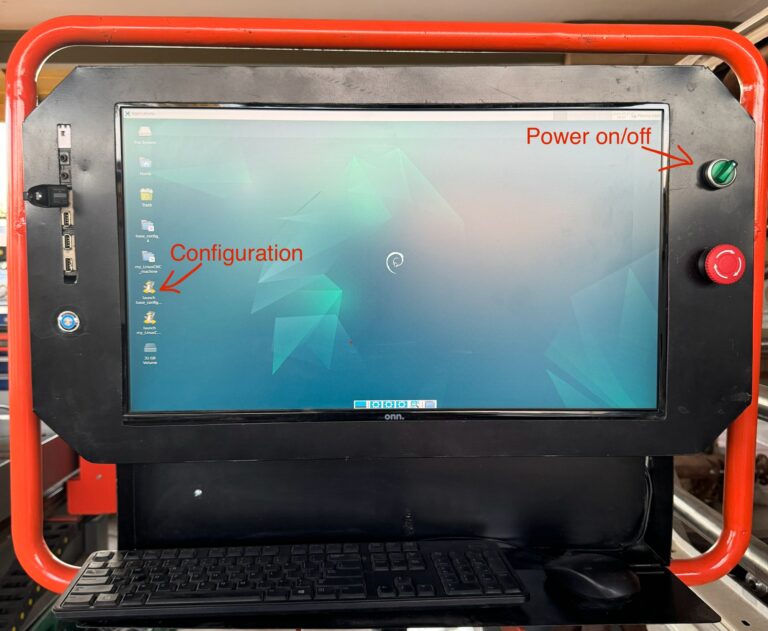
First step turn on the machine, login, and open your configuration of Qtplasmac.

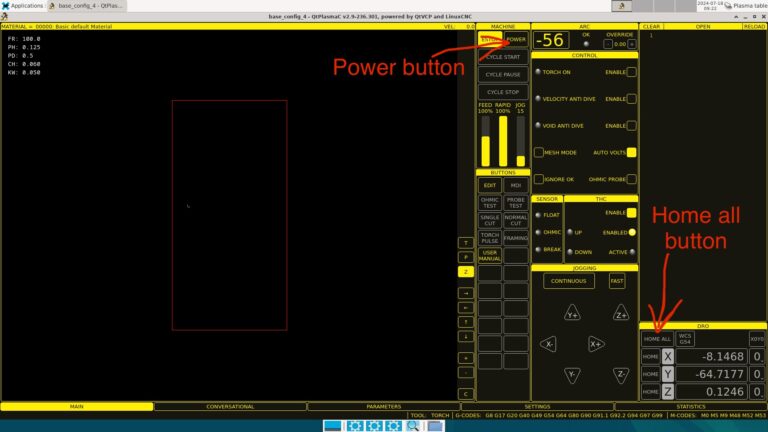
Second step click on power button and click on home all button to home your machine and make sure all axes go to their zero position.

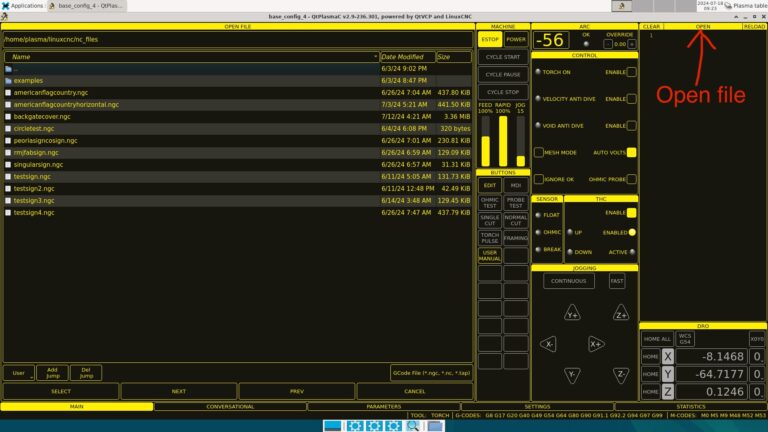
Third step load your Gcode file that you imported from CAM

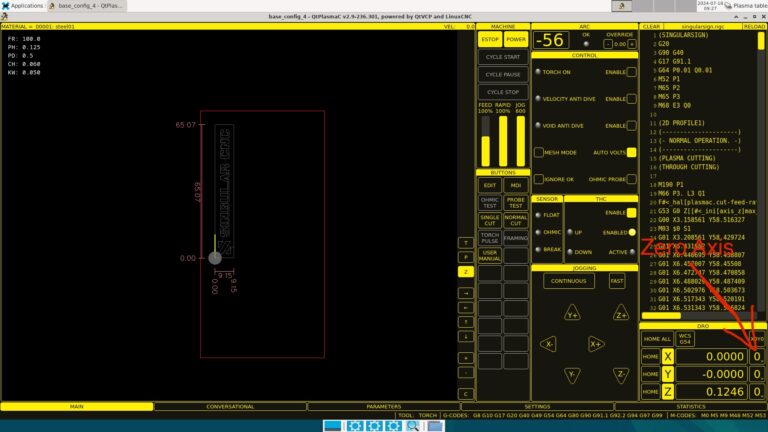
Fourth step set your origin position(starting position) and set X and Y axes to zero and then click on Cycle start to begin operation

Service
After you have made multiple operations you can then focus on maintaining your machine. Here are few important steps that will help ensure your machine continues to operate for years.
- Make sure linear bearings and gears are always lubricated and properly greased.
- Make sure all moving and stationary cables are free from damage caused by moving parts.
- Make sure the controllerbox is safe from water splashes or any water related instances that may occur.
- Check the water level on the coolant tank is properly filled to the correct level as the coolant will evaporate over time.
- Make sure controllerbox powers on an boots correctly without warnings.
